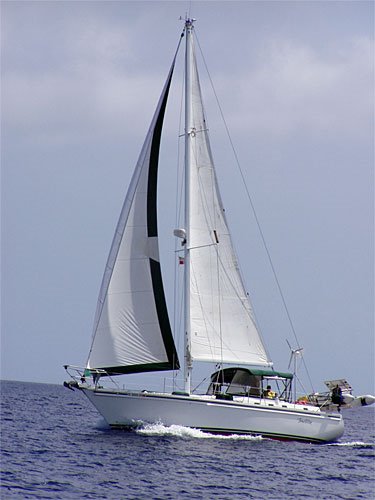
Tuesday, August 12, 2008

That Maxi Prop is a MARVEL

I took the Maxi Prop home to work on it. It looked pretty bad with years of different bottom paints and coatings on it. The fasteners had been abused but I was able to get it apart. I then tried just a bench mount wire brush but it only polished the bottom paint. I then used a small orbital finish sander and 100 grit sandpaper and removed the paint. I then dressed it with the wire brush to give a burnished look.

Look at 2 blades -- Before and after:


I processed all the other painted part and it all looked very good afterwards.

Look at the collection of parts awaiting reassembly:


Now I just need to wait for the replacement fasteners. The PYI Web site has a screw kit with all the fasteners and cotter pins used in the prop. I ordered the set.

That is all the work to be done here at home. Need to wait for the weekend and tackle the prop shaft again. I have the longish fasteners I'll need to press it out with.

Bruised, Sore, and Gouged!

Sunday was not a great day working on the boat but a necessary day.

After reviewing the steering and pondering the rudder it appears that the stiffness may be due to an interference between the rudder cutout and the skag that supports it. I hope this can be adjusted via the 4 bolts around the main top bearing or maybe drop the rudder an eigth inch.

I then looked over the prop shaft packing. Hmmm that prop shaft log is original and needs to be replaced. Well I had to undue the packing nuts first. Ohhhh somebody had no idea what tight is. It does NOT NEED to be that tight!! I had to use two bare feet to hold a pipe wrench on the locking collar and my very large Channel locks and both arms on the packing nut. It took both legs and my back to break that damn thing loose. But loose it came..

Now I have to remove the prop shaft from the engine coupling collar. I undid the locking bolts on the shaft and tried to pull -- uhhh no affect. I then tried pulling the prop shaft from outside -- no movement, then I put a nut on the prop shaft and tried to beat it out -- again LOSER!! I was going to have to remove the coupler from its mate. Now these are held together by 4 - 3/8" bolts which should have been torqued to 40 ft lbs. Well after numerous slips of the wrenches and gouging skin on cable ties and bruise knuckles and other body parts on anything else I had to resort to banging on a wrench handle with a hammer!! That put the torque used to tighten these babies in the 100 lb range -- just pure amateur inexperience!!

I got them apart but still could not remove the prop shaft. I will have to press the shaft out by alternately tightening the 2 couplers together with a socket between them -- a very slow painstaking process but effective.

After lunch I started to look seriously at removing the head seacocks. Ohh it does not look good. These Seacocks are the large flange style and bedded in 5200. I put a monkeywrench on one but moved nothing. I think I'll leave this job for the Marina. Not just because of the difficulty but if I do it and it leaks, then I'm looking at another $420 for a round trip to pull the boat out, repair, and relunch. Let's call this insurance.

I was tired, sore, cut, bruised, and a bit disheartened by now so I called it a day a little after 2pm. I needd to recharge before continuing.

HAULOUT 2008


Ohhh it's that time of year. Well actually no time is a good time to haul out.

I need to take care of a few things before the BIG cruise. We need to address the stiff steering, both head seacocks are stuck and need to be replaced, and we want to redo the dinghy davits -- hate the current arrangement. I'll also have the voids in the rudder found during the survey repaired, and I will clean and wax the boat, make serviceable all head y-valves, repack the prop shaft stuffing box and replace the prop shaft log. Time to completely disassemble the Maxi-Prop and lube it up good!!

I took the boat over to the Old Minnesott Beach Marina now called Wayfarers Cove. It was the first time into their channel too. Good thing Mark and Steve told me I could make it because damn -- it is narrow at the end of the channel -- maybe a good foot on each side of the boat.

No one to help so I had to single hand that big ol 42 in there myself. They put me a T-dock temporarily while they launched another boat and then let me back in that big ol 42. It took several iterations but I did it without bumping anything.
That Maxi Prop does have a little walk to port when in reverse.

The haul out went smooth but was HOT!! They put me in a spot next to the Haul out slip. Not bad but far from the showers.

There she is all blocked up -- top of page.

Ralph from Luna C came over mid afternoon to give me a ride back to Matthews Point to pick up my truck. After getting the boat settled and AC on we had a beer and relaxed then I took him to dinner at Gary's DownEast in his truck. Nice dinner then we took the Ferry over to Mathews Point.

I was worried the truck would be hard to start but it fired right up --Yippee for small things. Then back to the Ferry Crossing to wait the next ferry.

Now back on the Minnesott side it was DARK. Not a problem but it has been years since I drove back to the Minnesott marina. Oh boy a few wrong turns and it was 20 minutes before I found the Marina -- I was getting just a little worried.

A couple of Rum Swizzles and then off to bed but first rehashed my backing the Big ol,42 into the haul out slip -- I felt pretty good about that.


Saturday Morning I then surveyed what I was going to work on.

The bottom was not bad. Just barnacles around the lower parts of the keel and rudder where it would lie in the mud on those very low water days at the Marina.

The prop was foul with old paint and crap and a few barnacles. Here is the before shot:


What a job it was to remove that prop. All the fasteners were covered with old paint and barnacle leavings so it took awhile to find them. Then over the years they had been abused by sanding and ill fitting tools so it took some finessing to get it apart but I did. Packed it up to take home and clean it up right!!

I then washed the sides and removed all the Neuse Juice stains with Wood Bleach -- nearly pure Oxalyic Acid. Wow she is white now.

It was getting hot so retired inside of the AC courtesy of Jim and Barb's window unit and disassembled the steering quadrature and cables. I also opened the packing nut. Not too bad today since Jim and worked as a team last weekend to get it open -- damn it was tight -- too tight!!

The packing was there and not too deteriorated but very stiff. I thought the stiffness was due to this but not entirely. Still some there.

That was a days work. Mark came by late afternoon and I took him on a tour of Temptation and he took me to dinner in Oriental -- the Toucan Lounge. It was okay.

Back on the boat later on I just relaxed and read and then went to bed early -- 9pm.

All in all a pretty good start on the boat.

Saturday, May 10, 2008

On Top of TEMPTATION

Finally left the bilge and mechanical spaces of Temptation for the Great Outdoors. A beautiful day to be working outside.

The water system has finally been tamed. It has "beat me" so many times that I wanted to wait a few weeks before reporting that it is functional and reliable now. It turned out to be a multiplicity of problems with the biggest offender being partially clogged vent pipes. It now processes water well, but not perfectly -- that is another story.

We have done so much this winter on this boat. Replaced nearly all hoses and installed a plethora of toys. Just 2 weeks ago we actually tested the refurbished dinghy motor and took the boat for a sail. Ohh that felt good.

The number of improvements left now are quite few.

Some of the minor ones just bring so much joy; like correcting the hot/cold water faucets in the FWD head, installing a hand towel holder in the FWD head, installing a toilet paper holder in the cabinet door of the AFT head, replacing the AFT head sink fasucet which was too high and prevented the left door of the medicine cabinet to open -- how did people live with these annoyances for 16 years!!??

The Project for this week was to install a proper back stay antenna for the SSB. I had been using an internal delta loop antenna which worked great on Luna Sea but did not work very well at all on this boat.

My backstay is a 3/8" wire -- a big one for a yacht. I elected to use the Hy-Mod fail safe backstay insulators from Petersen Stainless Rigging of the UK -- high dollar!! But engineered very well.

The first task was to remove the existing backstay with my 230 lbs aloft.. I used the main halyard to hold the rear of the mast while the backstay was removed. We first attached a line across the aft cleats. Then ran the halyard to the center of this line and tensioned the halyard until the backstay became "droopy". I then went aloft with the aid of the Lighthouse Windlass and the assistance of Karen, Jim , and Barb. Once up there Jim checked that the backstay was still "droopy" and then I removed the attachment aloft and lowered the backstay down.

We removed the backstay from the boat and I commenced to install the insulators. I cut the wire using a dremel tool and metal cutoff wheel. Worked great. While installing the insulators in the wire -- Karen cleaned the stainless wire with a cleaner.


I installed the first insulator on the wire which took considerably longer than the dude in the Petersen Video who showed how it was done:
http://www.petersen-stainless.co.uk/NewFiles/ChooseCompFitt.html

I probably took 20 minutes on the first and maybe 8 on the last. It wasn't difficult just clumsy to position all the wires on the crown fitting. The finished product looked great and felt like it was really done right


Then it was back up the mast to re-install the backstay. This was more difficult than I expected. To hold the fitting in the holder and push the pin through it was complicated by the weight of the wire plus 6 lbs of insulators now and a strong breeze blowing the wire around. I could only use one hand on the wire and one on the pin and all while seated in a chair hanging from a pair of 3/8" line 57 feet in the air!!

Well we got it but then could not attach it at the deck. There was just too much sag in the wire coupled with the strong breeze. I solved this by attaching a boom vang to the lower insulator and drawing the backstay tight while er pushed the mounting pin home -- finally job done.

I spent the rest of the day sipping a few beers and assisting Jim to get his new engine aligned to the prop shaft in his boat. That was frustrating- backbreaking work.

In the evening we joined Craig and Doc at Gary's Seafood in Arapahoe for dinner. That was good. Then back to Temptation to relax with the Thompson's before calling it a day.

Sunday I hooked the antenna to the newly installed backstay antenna and of course it would not work!!! The antenna tuner would not tune. I use a SGC-230 Auto tuner and it is the simplest one on the market. Just connect power and ground and feed RF and it tunes. Well I heard no "chattering" when feeding the RF. We heard a large click when we turned it own so it looked like power and ground was getting there -- damn... I tested the tuner with a dummy load and it still did not tune so it wasn't the antenna or ground. I then went to the trouble to install the spare SGC-230 from the house. Crap -- it didn't tune either. I was fed up then.

Later after bringing the first antenna tuner home I tried it here and it worked fine. Thus there is a problem in the wiring -- either power/ground or the RF feeder. Well project for next trip.

Overall a fairly successful weekend and really the boat is ready to play. If she would just stop "testing" me with these surprises and tasks that need to be done twice.

Can't explain why I do it to a non-boater but you boaters know why.

Bon Voyage.

Sunday, March 30, 2008

Water System from HELL shows new tricks

Ohhhh it has been a tough weekend!!! The goal was to finally make the fresh water system on Temptation reliable. In short it was vastly improved but not before the "boat gods" kicked my ass!!

We pulled out all the stops in this effort. I wouldn't even start on a Friday night for "fear" of jinxing the effort. Saturday morning the system was running especially poorly. Finally Karen finished break feast and I was ready to get started -- a problem on this boat is only one person can be in the galley at a time and the engine room access is there too!!

I opened the engine room access door to mount a floodlight -- I mean I meant serious business here -- and the shelf with the pumps was completely WET. What a mess!! where did it come from?? A short investigation showed that the 5 month old HIGH DOLLAR Jabsco belt drive pump -- 96900-2000 had turned into a fountain. The top diaphragm had torn. Oh great... How do I test without a pump!!

Well not to be deterred I removed the pump and installed and jury rigged the old water pump -- a Shurflo. Then we started our series of tests isolating each component of the system and substituting something else for it.

We determined that the pump is sucking air. I bypassed the selector valve and still air. Gosh the only component is the QEST pipe between the tank and the pump!! It wasn't easy but I rigged a vinyl hose past the Qest pipe -- damn it worked well now -- no air. The air is entering from the rigid pipe!! Must be a hairline crack.

Well we thought we would just use it like this but a new problem arose. Once the pump turned off -- reached pressure then the next time it came on it wouldn't pump. Not until all the pressure on the output side would release -- i.e. no water coming out -- then it would pump.. Ohh this has got to be just the old pump problem.

I fought for awhile then gave in and went to Morehead City and killed 2.5 hours getting a rebuild kit for the Jabsco and some fittings to bypass the Qest pipe permanently.

When I arrived back at 5pm I called it a day.

We then attended a fine Birthday party for Kirsten in the clubhouse -- she turned 6 today.

Everyone had a great time. All the ladies received princess kits and had fun blowing bubbles and wearing gaudy jewelry.

This morning I started back on the water system. I first replaced the torn diaphragm in the Jabsco and reinstalled it. I then pulled out the old Qest pipe and installed new vinyl. ohhh it worked GREAT. The pump ran deep and hard and pumped up faster than it ever had. It was repeatable too...

I then pushed my luck and wanted to run the vinyl hose to the selector valve. I installed the fitting I bought yesterday but could not push on the 1/2" hose!! I tried it outside the enclosure -- Damn -- that clearly marked 1/2" barb is 1/2" inside!! They gave the wrong part!!!

I found another that would work and hooked it up. It worked but not as well -- sucks a little air from someplace. BUT acceptable operation.

We played with it and it seemed to work reliably. Ohh boy finally progress.

The water was nearly out from all the testing so I went to fill the tank -- I couldn't!! It overflowed almost immediately. Investigation showed the vent pipe was now PLUGGED. Son Of A Bitch!!! It was fine yesterday and now a NEW problem. Oh yes the end of the vent pipe in the Cockpit --- INACCESSIBLE!! Aaaaaaack!!

Well with the vent pipe off the vent tube the tank filled well and pumps well now. Next weekend we will attack the vent pipe.

What a water SYSTEM...

What has made this soooo difficult is the multiple problems.
1. Original pump ran weak and would not pump with any output pressure on the pump.
2. Air leaks coming in from the selector valve assembly.
3. Replacement pump has had some problems from the Get Go.
4. Hairline crack in Qest pipe on the FWD Tank.
5. Vent pipe not venting properly.

Essentially we have seen a problem in every component of the water system. It is the water system from HELL.

Wish me luck next week.

Sunday, March 9, 2008

Who Drained the NEUSE??


WOW what a weekend!! We had a terrific storm system pass through here Friday and Saturday. This system started in Texas, passed over Florida with killer tornadoes then up the eastern seaboard bringing rain, snow and wind.

Here we received rain and thunderstorms on Friday then B I G wind on Saturday. It was blowing 30kts at the Matthews point Marina with gusts to 56kts!! Most of it was from the SW so it blew the water out. This is the lowest I have ever seen in 16 years at the marina!! Temptation's deck was a good 4 feet below the finger pier. A real challenge to board the boat.

With the hatch cloths in place we took no water inside -- fortunately because there was a lot of rain. Saturday while the boat was rocking and rolling in the slip -- until the keel dropped 1.5 feet in the mud -- it was a challenge to work on the engine. I finally did get it back together but because of all the commotion and extreme shallowness I did not start it.

We spent the afternoon in the enclosed cockpit sipping a few beers and watching the wind machine to see what kind of gusts we were getting. The biggest was 56 kts. The enclosure did well but at some point the cloth hatch cover over the aft cabin hatch disappeared -- blew away. Well I get to do a little sewing now..

Sunday was Karen and mines 34th wedding anniversary so we celebrated Saturday night along with Jim and Barb Thompson by going to dinner at the Beaufort Grocery Company -- fine food as usual but ohh so crowded.

When we arrived back at the boat Saturday night the boats were even lower in the slips!! We were down a good 5 feet from the finger pier and Jim and Barb's SKAT was down nearly 6 feet.. Oh it was tough getting aboard. Because the water was so low I did not run the heat pump.

We did break in the new Karen Invention -- Bug Rugs!! this is a polar Fleece blanket and sheet sewn together to make a very comfortable personal sleeping encapsulation but nicer than a sleeping bag. The name comes from feeling like a "Snug bug in the rug".

Today I fired the main engine up --- should have been straight forward but when have I ever experienced straight forward... Yep turned the key and --- nothing... No click crank anything..

Well I started troubleshooting. I went over the relays and wires I cut the cable ties of of to remove the turbo charger. Ohh boy I found 2 wires not connected to anything!! I checked the schematic and these wires and relay are not even addressed in the schematic!! I did basic wiring tracing and found voltage at the ignition switch and then at the starter solenoid!! How come she no worky?? I slipped the wire back on the starter solenoid and it fired right up!!! Ohh boy. I looked for leaks and all looked fine. I wanted to stop it to check the fresh coolant level --- OHHH NOOO it won't stop!! We press the stop button but nothing happened -- just purrs along.. Good thing I didn't need to stop immediately.

Back to troubleshooting. I found the solenoid that is supposed to cut the fuel flow, I operated it manually and the engine shut down. Well good lesson learned.

Tracing wiring I found a relay covered in corrosion!! I CLEANED IT AND WORKED THE CONTACTS MANUALLY AND THEN THE SOLENOID OPERATED. Now I could start and stop the engine -- Ohh yes my new temperature gauge is working fine. It is a TELEX LIDO using the Yanmar sender. I had to use the Yanmar sender because Yanmar uses a bastard pipe thread on these senders. Something called BSPT -- British Steam Pipe Thread!!

Well overall a fine weekend and successful day but a whole lot more troubleshooting than expected.

Temptation is ready to GO... Next trip we will leave the slip. I'm not saying all projects are complete yet but she is working acceptable.

Ohh yes the stinking fresh water problems came back... That will be another story once I figure it out!!

Tuesday, February 19, 2008

Getting Better Every Week

WOW time has been flying. 2008 and almost through winter already.


Well Temptation has not done any sailing this winter but has been getting a lot of needed maintenance and upgrades. We have been down nearly every weekend working on the boat.


We have replaced most of the hoses. I have pulled and cleaned the heat exchangers on both Yanmars. The one on the Kohler Genset was the worst surprisingly since the engine hour meter was half that of the main engine. I had to pull the turbo charger off the main engine to get access to the heat exchanger there. The list of work done is extensive.


Upgrades!! A new ICOM 604 Marine VHF with Command Mic installed. The Auto Antenna tuner is installed correctly now. I have added a NMEA Multiplexer and have all instrumentation and 2 GPSs reporting to the PC with Coastal Explorer -- very cool.


Installed AMP meter to measure output of Solar Cells and Wind Generator.


Installed a water temp gauge to monitor the main engine.


Let's see -- installed a nice fan over the Nav Bench, replaced the finicky fluorescent lights in the main cabin with new ones. Replaced the main halyard winch with a new Anderson winch -- Ouch on that expense.


The gauges in the 2 water tanks and fuel tank were not working and all used different senders. I bit the bullet and installed a Hart Tank Tender and all the tanks are reporting to a single easy to read meter on the Nav Bench.

Replaced the Sink faucet in Aft Head -- the original was too tall and prevented one of the 2 cabinet doors from opening -- this gained us needed access to the cabinet and a smart looking faucet.


I'm sure I've missed other improvements. The amount of work is astounding. Every tasks takes 2 to 4 times what I expect it to take. Progress has been slow but very steady. Looking back now I'm impressed with all that we have done and this is on a boat that we thought needed very little!! Damn I hate to think what a "fixer upper" would have taken..


The task left now is to reassemble the partially dissasembled engines. Just waiting on some formed hoses from Torreson Marine. Again everything (deliveries included) take longer than expected. It is a good thing I'm not pressed for time -- yet!!


Ohh one of the most surprising jobs was the replacement of the impellor in the 15HP Yamaha outboard. Simple enough -- just $32 --- WRONG --- $250 dollars later and probably 30 hours labor..


That motor was all corroded inside. Impellor had never been touched since 1993. It started with breaking 2 of the 4 bolts that hold the impellor housing. To remove the housing and the broken bolts I had to go into the foot --- there the cover had to be removed in small pieces and that part alone was $100!! Everywhere I turned I encountered corroded parts inside that motor.


She is right now though.


Won't be long --- will be sailing again...